

Step-by-Step GPS Tracking Guide
Do you want to track the location of your vehicle but don't know how to start? This guide will walk you through the basic steps and show you that it's not difficult at all. So let's get started.
1. Choose and purchase the right GPS tracker
On the Devices page, you can see the devices supported on the platform and choose the one that suits you best.
On the Where to buy page you can see the service providers from whom you can purchase the tracker and who can help you to use the application.
If you wish, you can purchase the tracker in any other place convenient for you.
If you already have a tracker, continue with the next step.
Important to know
If you have a tracker that is not on the list of supported devices, then you can write to us, and perhaps we'll be able to connect this device.

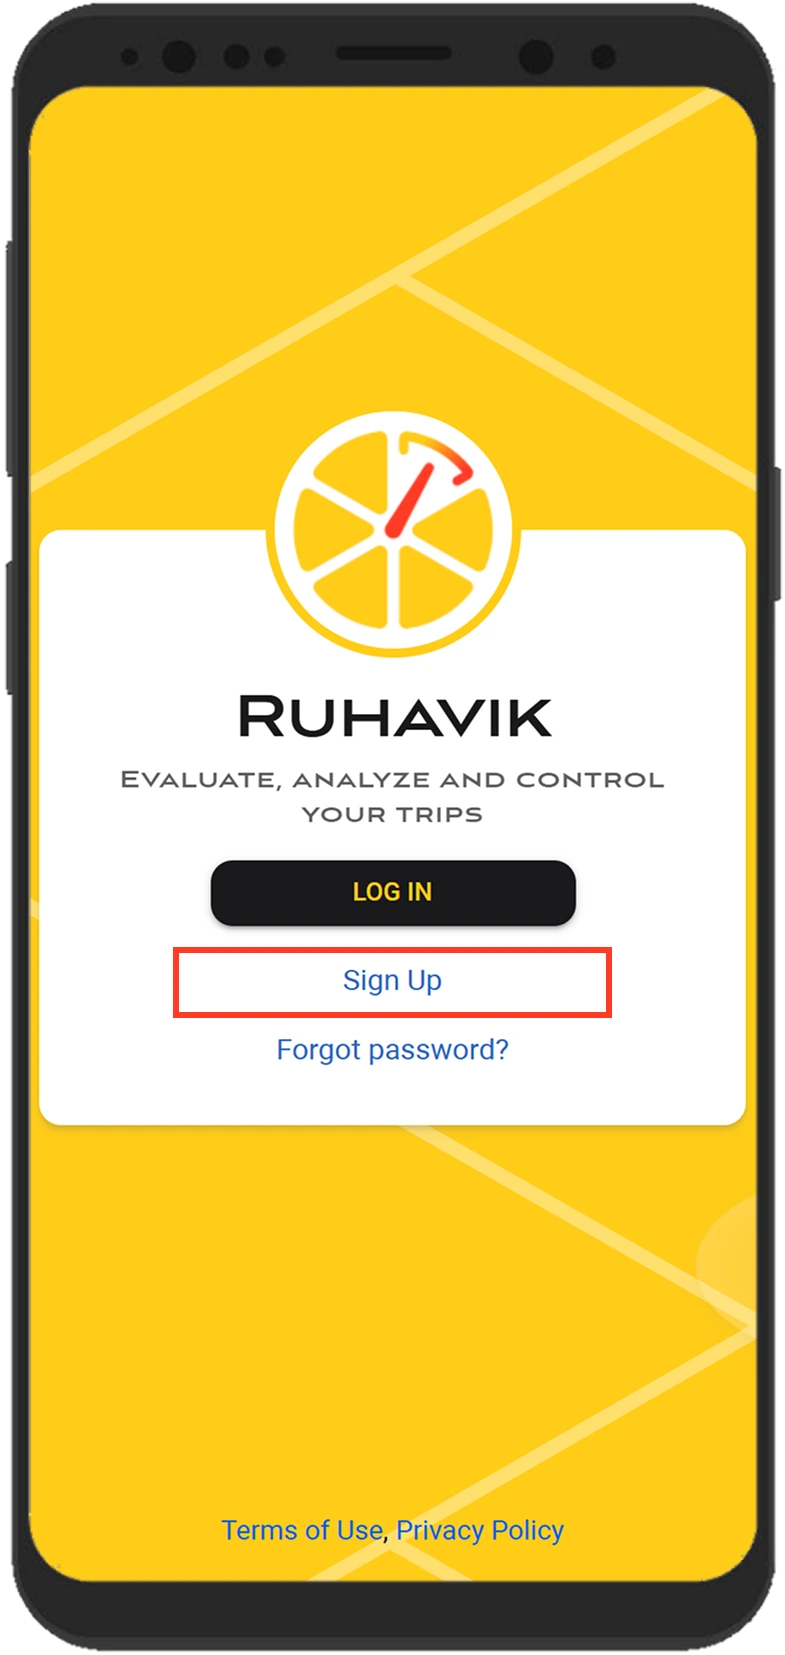
2. Create an account and log in to Ruhavik
To start using Ruhavik, you need to create an account first. You can download the application from Google Play or the App Store, or use its web version.
- To create an account, click Sign Up on the app login form.
Alternatively, you can click the Sign Up button in the upper-right corner of this website. - Complete the registration form and confirm your email address. The process takes no more than 5 minutes.
- Once your account is created, log in to Ruhavik using the email and password you entered during registration.
Important to know
You can also purchase paid subscriptions on this website after signing in. Click Subscribe and pay using Stripe or PayPal.
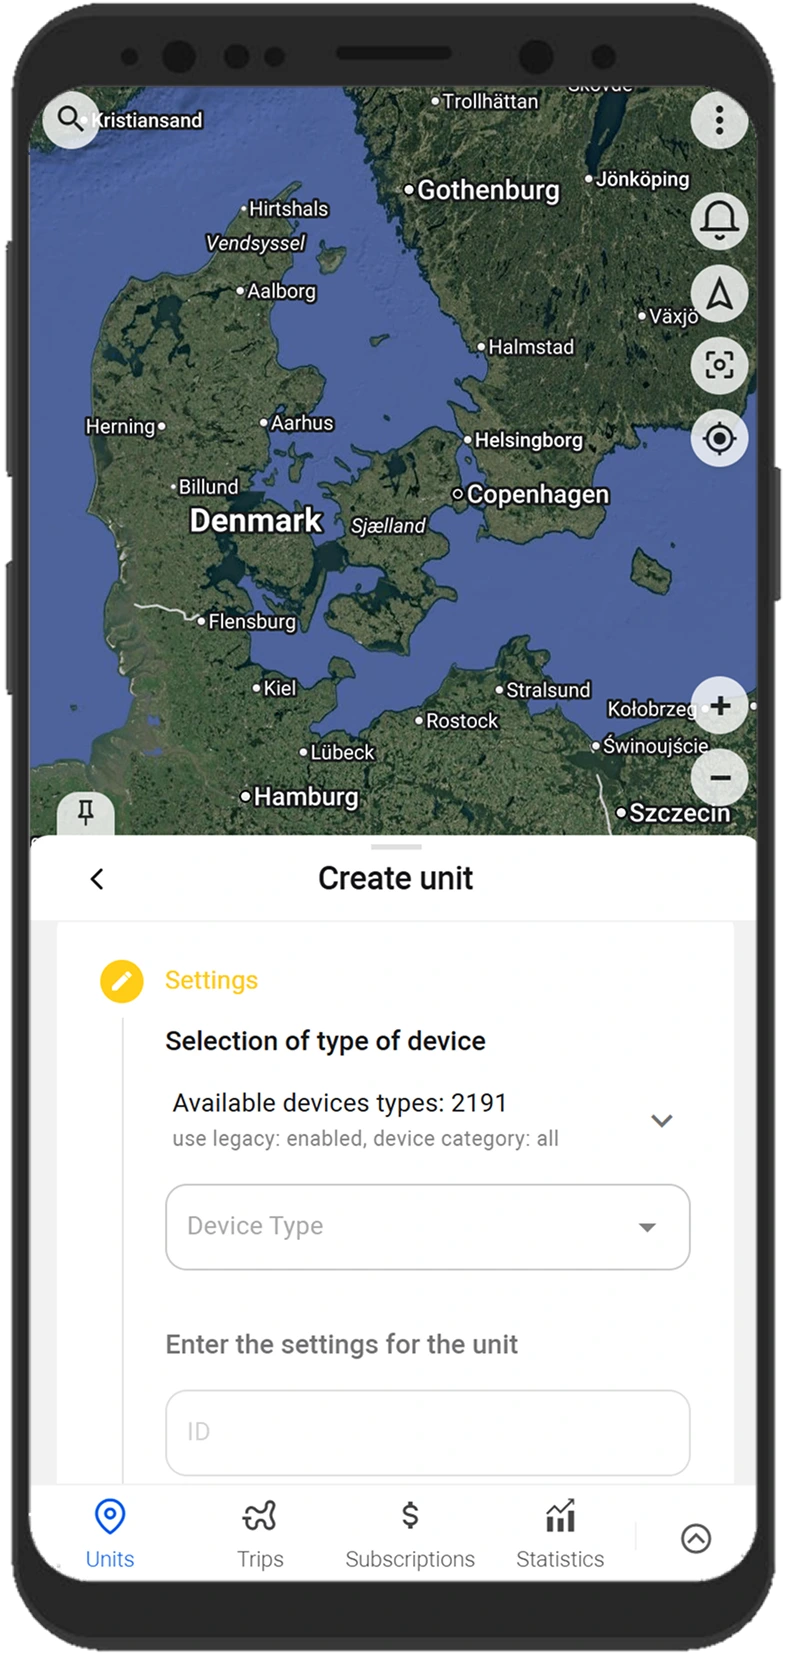
3. Create a unit
The unit denotes what you want to track, for example, a vehicle.
It won't take long to create it.
To create a unit, click on the unit selection field and select Create unit.
A step-by-step form for creating a unit will open:
- Select the model of your GPS device (tracker) from the list.
- Provide the details of your tracker, such as its ID (IMEI) and, if required, a password.
- Click on the Save button.
Important to know
The unit will be created with some characteristics, such as a name, by default. You can change them later in the unit settings.
4. Configure the tracker
After creating the unit, you should connect it to your tracker. Thus, the tracker will be able to send data to the application.
To do this, configure the tracker by performing the following actions:
- Configure the server and port for data transmission
When the unit is created, the application shows the server address (IP or DNS) and the port to which you should direct your tracker so that the system begins to receive data, process it and display in the application. - Set the UTC 0 time zone
For most trackers, regardless of your location, set exactly the UTC 0 time zone. In the application, your local time zone is determined from the data of the device (phone or computer) on which you use it. - Configure the APN
Configure the APN according to the provider of the SIM card you are using with the tracker. Depending on the provider, this can be just the APN or also the APN username and password.
As soon as you adjust the necessary settings and your tracker starts sending data to the configured server address and port, you can immediately see it on the map in the application.
Important to know
Data transmission trackers should be used with a SIM card or a chip.
Most often, the guide to configuring the tracker is provided with the device. You can also request it from the seller or the manufacturer of your GPS tracker.
The tracker is usually configured using SMS commands specified in the tracker guide. The commands are sent to the number of the SIM card used with the tracker.
Some trackers may have a special program for setting up via a computer.
Useful Ruhavik features
Ruhavik helps you track the location of a unit on the map and use data from your GPS tracker in everyday scenarios. In the app, you can view trips, check past events, create geofences, receive notifications, share the unit’s location with other people, and use other tools for working with tracker data.
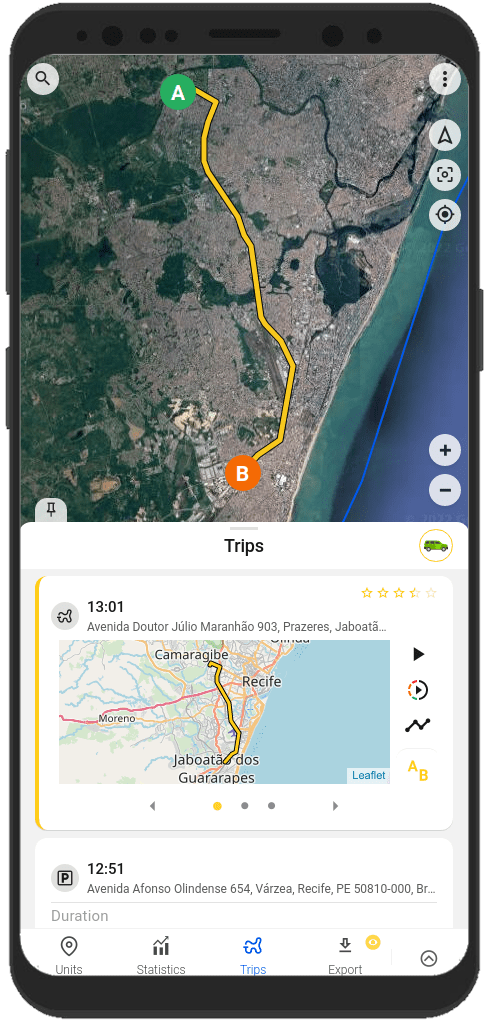
Building the tracks and viewing the events of your unit
Do you want to know where exactly your unit was a few hours or days ago? It only takes a few clicks to find out this.
Using the application, you can view a detailed history of movements, track the events that happened to the unit over the past period.
You can view such information on the Trips and Timeline tabs and on the History tab of the unit menu.
Important to know
You can also download reports based on unit history and events.
The available report types and download formats may depend on whether your account has an active paid subscription.
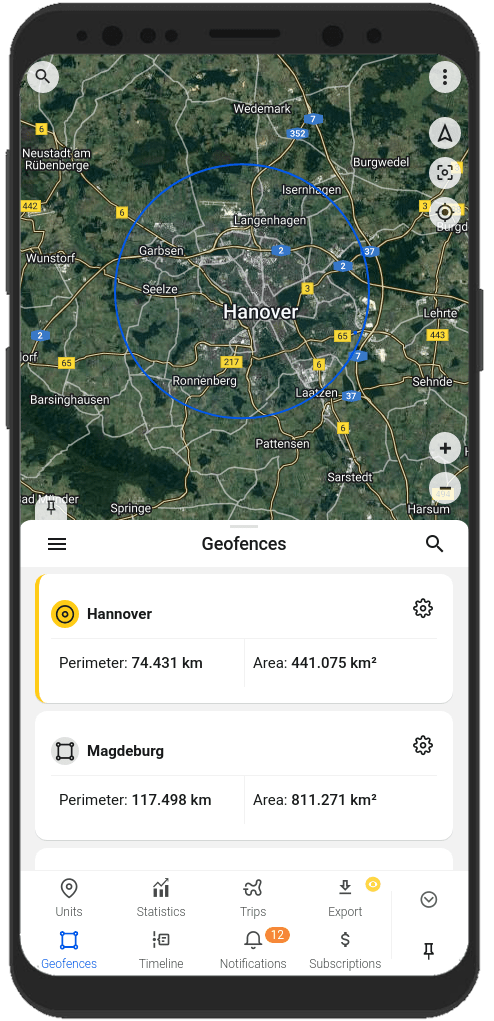
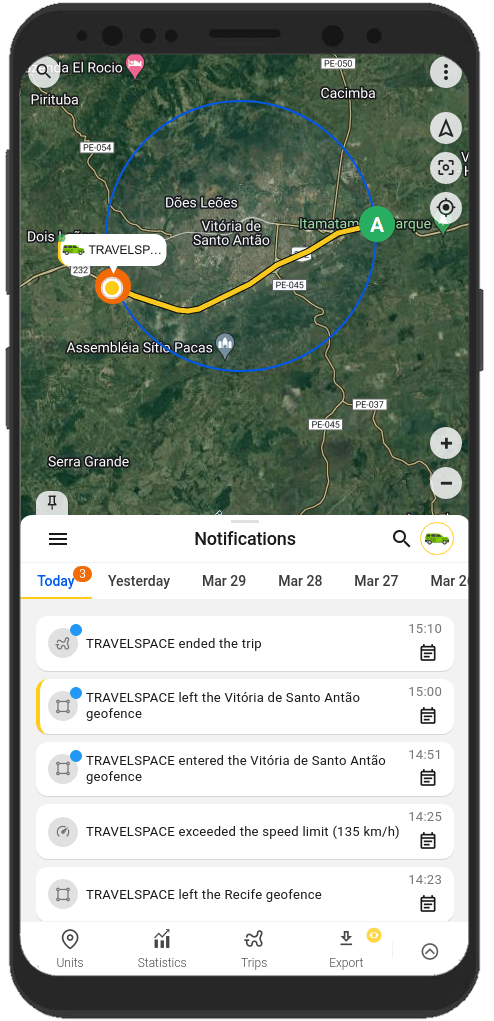
Creating geofences
A geofence is an area marked on the map.
As a rule, geofences are used to create notifications that a unit is inside a certain area or has left it. Also, geofences will help you navigate the map faster.
You can create and edit geofences on the Geofences tab in the app.
Important to know
Ruhavik also has Security mode. When you enable it, the app automatically creates a 100-meter zone around the unit. If the unit leaves this zone, you receive a notification about a security zone violation.
Receiving notifications about the unit state and events related to the unit
Ruhavik can notify you about important events related to your unit. Receive notifications in the way that suits you best: in-app notifications, push notifications, Telegram and email notifications, webhook notifications.
You will always know:
- about the unit entering the geofence and exiting from it;
- about the unit exceeding the specified speed;
- about the beginning and end of the trip;
You can configure notification types and sending methods on the Notifications tab, in the unit notification settings or in the user menu.
Important to know
You can also create notifications based on parameters sent by your tracker in Ruhavik.
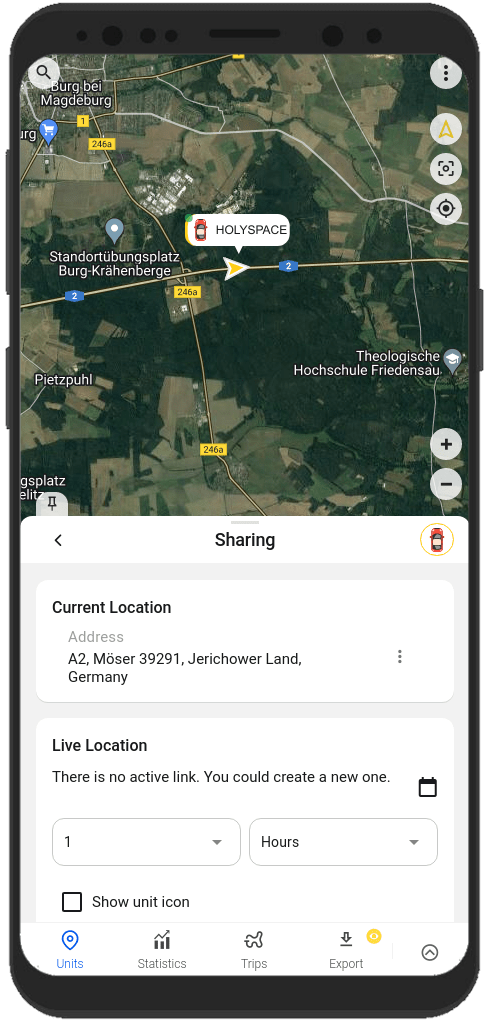
Sharing your unit location with other people
You can share your unit location with family members, colleagues, or other trusted people.
In Ruhavik, you can generate a link that opens the current location of your unit. To do this, use the Sharing option in the unit menu.
Important to know
Sharing option is available with an active paid subscription. In Ruhavik, you can create a sharing link for one unit or several units and set how long the link will remain active, for up to 1 year.
You can always find information on setting up and working with the features in our documentation.
You can also use the AI assistant on the website. If you sign in to your account, the assistant can provide more personalized answers based on your Ruhavik data.